


If you’ve ever nailed your routine… then watched makeup undo it by noon, you’re not imagining it.
For fungal acne prone skin (Malassezia prone, textured, “tiny bumps that come out of nowhere”), makeup can feel like the final boss: foundations that look gorgeous for an hour, then suddenly you’re itchy, bumpy, or congested for days.
The truth is: it’s usually not makeup itself it’s formula weight, ingredient type, buildup, and removal.
The good news? You don’t have to choose between coverage and calm. You just need a smarter framework.
Quick Note Before We Start
“Fungal acne safe” isn’t a guarantee. Brands reformulate, and triggers are personal. Always check the INCI, patch test, and introduce one new product at a time.
The Framework: What Usually Works Best
Rule 1: Start with the lightest category that gives you what you need
When you’re Malassezia prone, “more emollient” often means “more risk.” That’s why many people do better with:
- Powder bases (breathable, fewer heavy emollients)
- Spot coverage instead of layered full-face coverage
- Powder blush and bronzer instead of creams while you’re troubleshooting
Rule 2: Reduce layers
It’s rarely one product. It’s the stack: primer + foundation + concealer + cream blush + setting spray + sunscreen… sitting for 10 hours. When symptoms flare, simplify the stack.
Rule 3: Removal matters as much as the makeup
Even “safe” products can backfire if they’re not fully removed especially around the nose, hairline, jaw, and under makeup-heavy areas.
Step-by-Step: A Fungal Acne Friendly Makeup Routine
Step 1: Build a calm base (makeup sits better on stable skin)
Makeup looks smoother and wears longer when your skincare is consistent. If your skin is already flaring, adding new makeup makes it hard to identify the trigger. Keep your base routine boring and repeatable (cleanser + lightweight hydration + barrier support).
Step 2: Choose your base category wisely
Option A: Powder foundation (best starting point for many)
Powder is often easier because it tends to feel lighter and less occlusive. Examples to explore (always verify INCI):
- Fenty Beauty Pro Filt'r Soft Matte Longwear Foundation
- bareMinerals Original Loose Powder Foundation
- Priia Cosmetics Loose Mineral Foundation
- Jane Iredale PurePressed Base
- L’Oreal Paris Infallible Pro-Matte Foundation (liquid)
- Bourjois Healthy Mix Foundation (liquid)
Option B: Tinted mineral SPF as your “foundation”
This is one of the easiest ways to reduce layers: skincare + coverage in one step. Examples to explore (verify INCI):
- Colorescience Face Shield SPF 50 (tinted)
Step 3: Conceal strategically (don’t paint the whole face)
Instead of stacking full coverage, use light base coverage and spot conceal only where needed. Examples (verify INCI):
- Charlotte Tilburry Magic Away Liquid Concealer
- bareMinerals Loose Powder Concealer
- Lily Lolo Mineral Concealer
- Urban Decay’s All Nighter Waterproof Concealer
- NYX Can’t Stop Won’t Stop Contour Concealer
Step 4: Skip cream blush while you’re troubleshooting
Cream blush is beautiful and also more likely to rely on richer emollients. Start with powder until your skin is calm and predictable again. Examples (verify INCI):
- Antonym Cosmetics - Baked Blush
- bareMinerals Gen Nude Powder Blush
- Lily Lolo Pressed Blush
- Priia Cosmetics Loose Mineral Blush
Step 5: Add bronzer lightly (definition without heaviness)
Keep it minimal and focus on blendability. Examples (verify INCI):
- bareMinerals Warmth All-Over Face Color
- Lily Lolo Bronzer
- Priia Cosmetics Vacation In a Jar Mineral Bronzer
- Kevyn Aucoin Sculpting Powder
Step 6: Treat primer as optional
Primer is not required and for many Malassezia prone people, skipping it improves outcomes because it reduces layers. If you do use primer:
- Apply only where needed
- Use the smallest amount possible
- Patch test like it’s an active
Examples (verify INCI):
- Bare Minerals Prime Time Foundation Primer
- Fenty Beauty Pro Filt’r Mattifying Primer
-
The POREfessional Face Primer
Step 7: Set the base (so it doesn’t melt into the skin all day)
If you’re wearing a liquid base or tinted SPF, a light powder set can reduce transfer and reduce “wet” product sitting on the skin all day. Think: less slip, less buildup, fewer surprises.
- Bare Minerals Deluxe Hydrating Mineral Veil Finishing Powder
- Maybelline Fit Me! Loose Finishing Powder
- Too Faced Peach Perfect Mattifying Setting Powder
Step 8: Keep eye and lip products easy to remove
Eye and lip products are usually less problematic than base products but removal matters. Choose formulas that come off without aggressive scrubbing.
Step 9: Removal protocol
If you wear makeup daily, aim for gentle cleansing, thorough removal, and no harsh scrubbing. A common mistake is leaving residue in “invisible” places:
- Sides of nose
- Hairline
- Jawline
- Around the mouth
If you’re flaring: simplify makeup, simplify removal, and stop adding new products until your skin settles.
Step 10: Tool hygiene is non-negotiable
Even perfect products can backfire if your tools hold buildup. Wash brushes regularly, let them dry completely, and replace sponges often (they hold moisture + residue).
The Bottom Line
Makeup doesn’t have to be the reason you restart your routine. When you choose lighter categories, reduce layers, verify ingredient lists, and remove thoroughly you can wear makeup without sabotaging your progress.
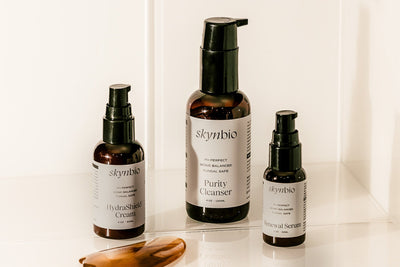
Skynbio was built for people who are tired of guessing.
Our microbiome-safe, oil-free approach is designed to support the barrier with a simple, consistent routine so your skin can feel calm, balanced, and resilient.
Explore the Skynbio Clear Balance Trio →